How to Prepare Walls for Painting: The Pro Method
Prep Is 80% of the Job
The single most common reason interior paint jobs fail prematurely — peeling, cracking, bubbling, uneven sheen — isn't the paint itself. It's inadequate surface preparation. Professional painters spend as much time preparing walls as they do applying paint. For DIYers, this is the step most often rushed or skipped entirely because it's tedious, unglamorous work with no immediate visual payoff.
This guide covers every step professional painters execute before a single drop of paint touches the wall. Follow this process, and your paint job will last 8–12 years in a Chicago home. Skip steps, and you'll be repainting in 3–5.
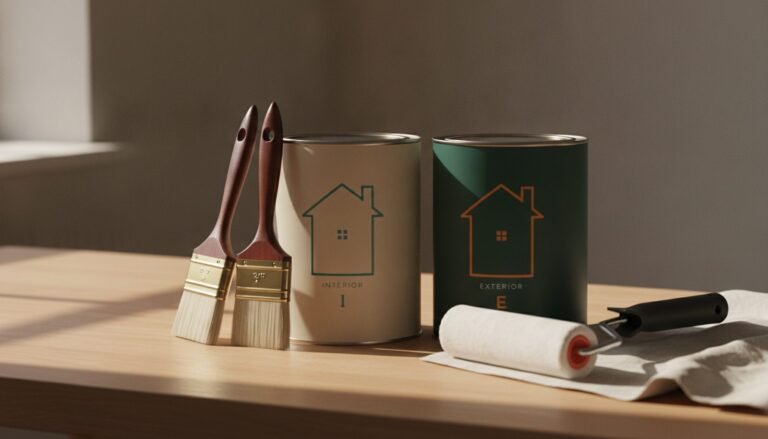
Tools and Materials You'll Need
- TSP substitute cleaner (trisodium phosphate alternative — available at Ace Hardware or Home Depot)
- Spackle (for small nail holes and minor dents up to 1/2 inch)
- Joint compound (for larger cracks, drywall damage, and plaster repairs)
- Sandpaper: 80-grit (heavy material removal), 120-grit (surface smoothing), 150–180-grit (final smoothing before primer)
- Sanding sponges (for curved surfaces and inside corners)
- Putty knife (3-inch and 6-inch)
- Painter's tape (3M ScotchBlue Pro for clean lines; FrogTape for fine-line work)
- Drop cloths (canvas, not plastic — canvas lies flat and doesn't slip)
- Primer (see recommendations below)
- Tack cloth or damp microfiber (dust removal after sanding)
Step-by-Step: The Professional Wall Prep Process
Step 1: Clear and Protect the Room
Remove furniture from the room entirely when possible — painting around furniture increases the time required and the risk of accidents. For heavy furniture that can't be moved, push it to the center of the room and cover with canvas drop cloths. Remove all outlet covers, switch plates, and light fixtures (turn off the circuit first). Remove nails, picture hooks, and any wall-mounted hardware. The goal is a clean, unobstructed wall surface.
Step 2: Clean All Surfaces — This Step Cannot Be Skipped
This is the step DIYers most consistently skip, and it's responsible for more paint failures than any other single factor. Walls in kitchens and dining areas accumulate a thin film of cooking grease. Walls near fireplaces carry soot residue. Even "clean" living room walls have dust, hand oils, and cleaning product residue on the surface — all of which prevent proper paint adhesion.
Mix TSP substitute (follow package dilution ratio) with warm water. Wipe all surfaces with a sponge or cloth. Start from the top of the wall and work down. Allow surfaces to dry completely — at least 2–4 hours in normal Chicago humidity — before proceeding. In winter, when Chicago interior humidity can drop below 20% with heating systems running, drying time is faster.
Step 3: Inspect and Repair All Damage
Work systematically across each wall in good raking light — a work light or bare bulb held at a low angle reveals surface imperfections invisible under normal overhead lighting. Mark every imperfection with a small piece of tape.
For nail holes and small dents (under 1/2 inch): Use lightweight spackle. Apply with a 3-inch putty knife, slightly overfilling the hole. Allow to dry completely (30–60 minutes for lightweight spackle), then sand flush with 120-grit paper.
For larger holes and cracks (1/2 inch to 3 inches): Use setting-type joint compound (Durabond 20 or 45) rather than lightweight spackle. Setting compound is harder, stronger, and less prone to shrinkage. For holes larger than 3 inches, use a drywall patch kit or cut-and-patch with new drywall.
For cracks in plaster: Chicago's older homes (pre-1940s, common in Wicker Park, Pilsen, Bridgeport, and many North Side neighborhoods) have plaster walls that develop hairline cracks through seasonal movement. Widen the crack slightly with a putty knife to create a V-groove, fill with joint compound, allow to dry, and apply fiberglass mesh tape over the repair before skim-coating. Attempting to paint directly over hairline cracks with filler will result in the crack reappearing through the new paint within one heating season.
Step 4: Sand All Repaired Areas (and Glossy Surfaces)
Every repaired area must be sanded smooth before painting. The goal is a surface that's flush with the surrounding wall — you should not be able to feel any ridge or bump when you run your hand across the repair. Use 120-grit to knock down high spots, then finish with 150-grit for the final smoothing.
If painting over previously painted glossy or semi-gloss surfaces: The entire wall surface (not just repairs) needs light scuff-sanding with 150-grit. Paint does not adhere reliably to high-gloss finishes without mechanical abrasion. Run a sanding sponge across the entire wall surface, wipe with a damp microfiber cloth, and allow to dry before priming.
Step 5: Prime — And Know When You Actually Need It
Not every repaint requires full-wall priming, but the following situations always do:
- New drywall or plaster (always prime — unprimed drywall absorbs paint unevenly)
- Any repaired area (bare spackle and joint compound will flash through finish paint without primer)
- Going from a dark color to a significantly lighter color
- Painting over a water stain or smoke damage (use shellac-based primer like Zinsser BIN — standard primer will not block these stains)
- Painting over a glossy surface that you've scuff-sanded
Best primers for Chicago interior conditions: Sherwin-Williams PrepRite ProBlock Primer (134) is our standard go-to for most interior surfaces. For stain-blocking, Zinsser Bulls Eye 1-2-3 is reliable for water stains; Zinsser BIN (shellac-based) is required for severe smoke or pet odor penetration. Kilz Premium is a solid mid-tier option available at most hardware stores.
Step 6: Tape and Protect Edges
Apply painter's tape after priming (not before) for the cleanest results — primer can seal the tape edge slightly and prevent bleed-through. Press tape firmly along its entire length using a putty knife edge. Remove tape while the paint is still wet (not after it's cured) for the cleanest line. Pull tape back on itself at a 45-degree angle, not straight out.
Chicago-Specific Considerations
The Lead Paint Issue in Pre-1978 Homes
Chicago has an exceptionally large stock of pre-1978 housing. If you're sanding walls in a home built before 1978, you must test for lead paint before beginning. Lead test kits (3M LeadCheck, available at hardware stores, ~$15 for two swabs) give results in 30 seconds. If the test is positive, sanding dry creates hazardous lead dust. Stop work, consult an EPA-certified contractor, and do not proceed without proper containment and HEPA equipment.
Best Time of Year to Paint Interiors in Chicago
Chicago's cold winters actually create good interior painting conditions — low humidity means faster dry times between coats. However, if the home has been closed up with minimal ventilation, VOC buildup can be a concern. Ensure good airflow with fans during and after painting. Spring and fall are ideal — temperatures are moderate, and humidity is manageable with windows cracked for ventilation. Avoid painting in rooms with very high humidity (like a bathroom post-shower) without allowing the space to ventilate first.
The Most Common DIY Prep Mistakes
- Skipping the cleaning step — leads to poor adhesion and early peeling
- Not allowing repairs to dry completely — painting over wet spackle causes bubbling
- Sanding in one direction only — use random orbital motion or cross-hatch sanding for smooth results
- Not feathering repairs into surrounding surface — leaves detectable edges that show through paint in raking light
- Skipping primer on repaired areas — creates "flashing" where repairs absorb paint differently than the surrounding wall
- Applying tape too early — tape applied over fresh paint can peel paint when removed
- Removing tape after paint has fully cured — causes chipping along the tape line
At RenewBuild, prep accounts for approximately 35–40% of total project time on every interior job. We never skip it, and every painted surface we deliver is inspected under raking light before any finish coat goes on. That's why our work lasts.
Get Your Free Estimate
We prep properly, prime correctly, and stand behind our work with a written warranty. Get a detailed estimate from Chicago's most meticulous painting team.
Related Articles
RenewBuild Serves Chicago & North Shore
Looking for a painter near you? We serve homes and businesses across Chicagoland.